The Complete Used RV Inspection Checklist
Most used RV inspection checklists you’ll find online cover the same ground: walk the exterior, check for water damage, test the appliances, look at the tires, review the paperwork. That’s a reasonable starting framework, and we’ve built it into this checklist too — you should be checking all of those things.
But there’s a pattern worth calling out. Look closely at even the most thorough checklists from RV dealers and storage companies, and the electrical and solar section usually gets reduced to a single line — something like “test the generator, inverter, and solar panel system if applicable.” For a system that can cost thousands of dollars to repair or replace, and that determines whether the RV can actually do what you want it to do off-grid, that’s not nearly enough.
This checklist covers every zone a good inspection should — and then goes deep on electrical and solar, because that’s where Chris Killeen’s NRVIA certification and ABYC marine electrician background actually matters.
Why a Real Inspection Matters More Than a Test Drive
A test drive and a walkthrough tell you whether an RV starts, drives, and looks presentable. They tell you almost nothing about whether the roof has a slow leak that hasn’t shown up as a stain yet, whether the battery bank is at 40% of its original capacity, or whether a previous owner’s DIY solar install has a wiring mistake waiting to become a real problem. A proper inspection is about finding the expensive things that aren’t visible in twenty minutes of looking around.
Exterior & Roof
Walk the full exterior in good light, ideally not right after the RV has been washed (water can temporarily hide small cracks and gaps). Check the roof material for cracking, soft spots, or separation at seams — walk on it carefully if the RV type and roof material allow it, since roof problems are some of the most expensive to discover late. Check all seals and caulking around vents, skylights, antennas, and any rooftop equipment for cracking or gaps. Inspect siding and fiberglass for delamination (bubbling or separation of the outer layer), and check window and door seals for cracking or gaps. Look over awnings for tears and proper operation, and check storage bay doors and seals. Inspect tires for age (check the DOT date code, not just tread — RV tires often age out before they wear out) and for cracking in the sidewalls from UV exposure.
Water Damage & Moisture Intrusion
Water damage is the single most common expensive problem in used RVs, and it’s often hidden. Check around every sink, shower, and tub for soft spots or discoloration in the surrounding material. Check ceilings near roof penetrations (vents, AC units, skylights) for staining or soft spots. Check the walls and floor around every slide-out for water intrusion, since slide seals are a common leak point. Open cabinets under sinks and check for staining, swelling, or a musty smell. If you can access it, check the underbelly for signs of water intrusion or previous repairs. A moisture meter, if you have access to one, can catch problems that aren’t visible yet — many RV inspectors use one as standard practice for exactly this reason.
Electrical & Battery System — The Section Most Checklists Get Wrong
This is where a real inspection earns its cost. Most used RV checklists give this one line. Here’s what actually needs checking.
Testing the converter and inverter under real load
Don’t just confirm the converter and inverter power on — test them under an actual load. Run several 120V appliances at once off the inverter and watch for voltage sag, unusual heat, or the inverter cutting out. A converter or inverter that “works” when lightly tested can still fail or underperform under the load you’ll actually put on it while camping.
Battery age, chemistry, and true health
Identify what type of battery bank is installed — lead-acid, AGM, or lithium — since this materially affects both remaining lifespan and what a replacement will cost. Check the battery’s date code or ask for purchase records if available; RV batteries are frequently older than a casual look suggests. A voltage reading alone doesn’t tell you much about true remaining capacity — a proper capacity test (discharging the battery under a known load and measuring how long it holds up) is the only real way to know whether you’re buying a battery bank with years of life left or one that needs replacing within months.
Inspecting an existing solar system
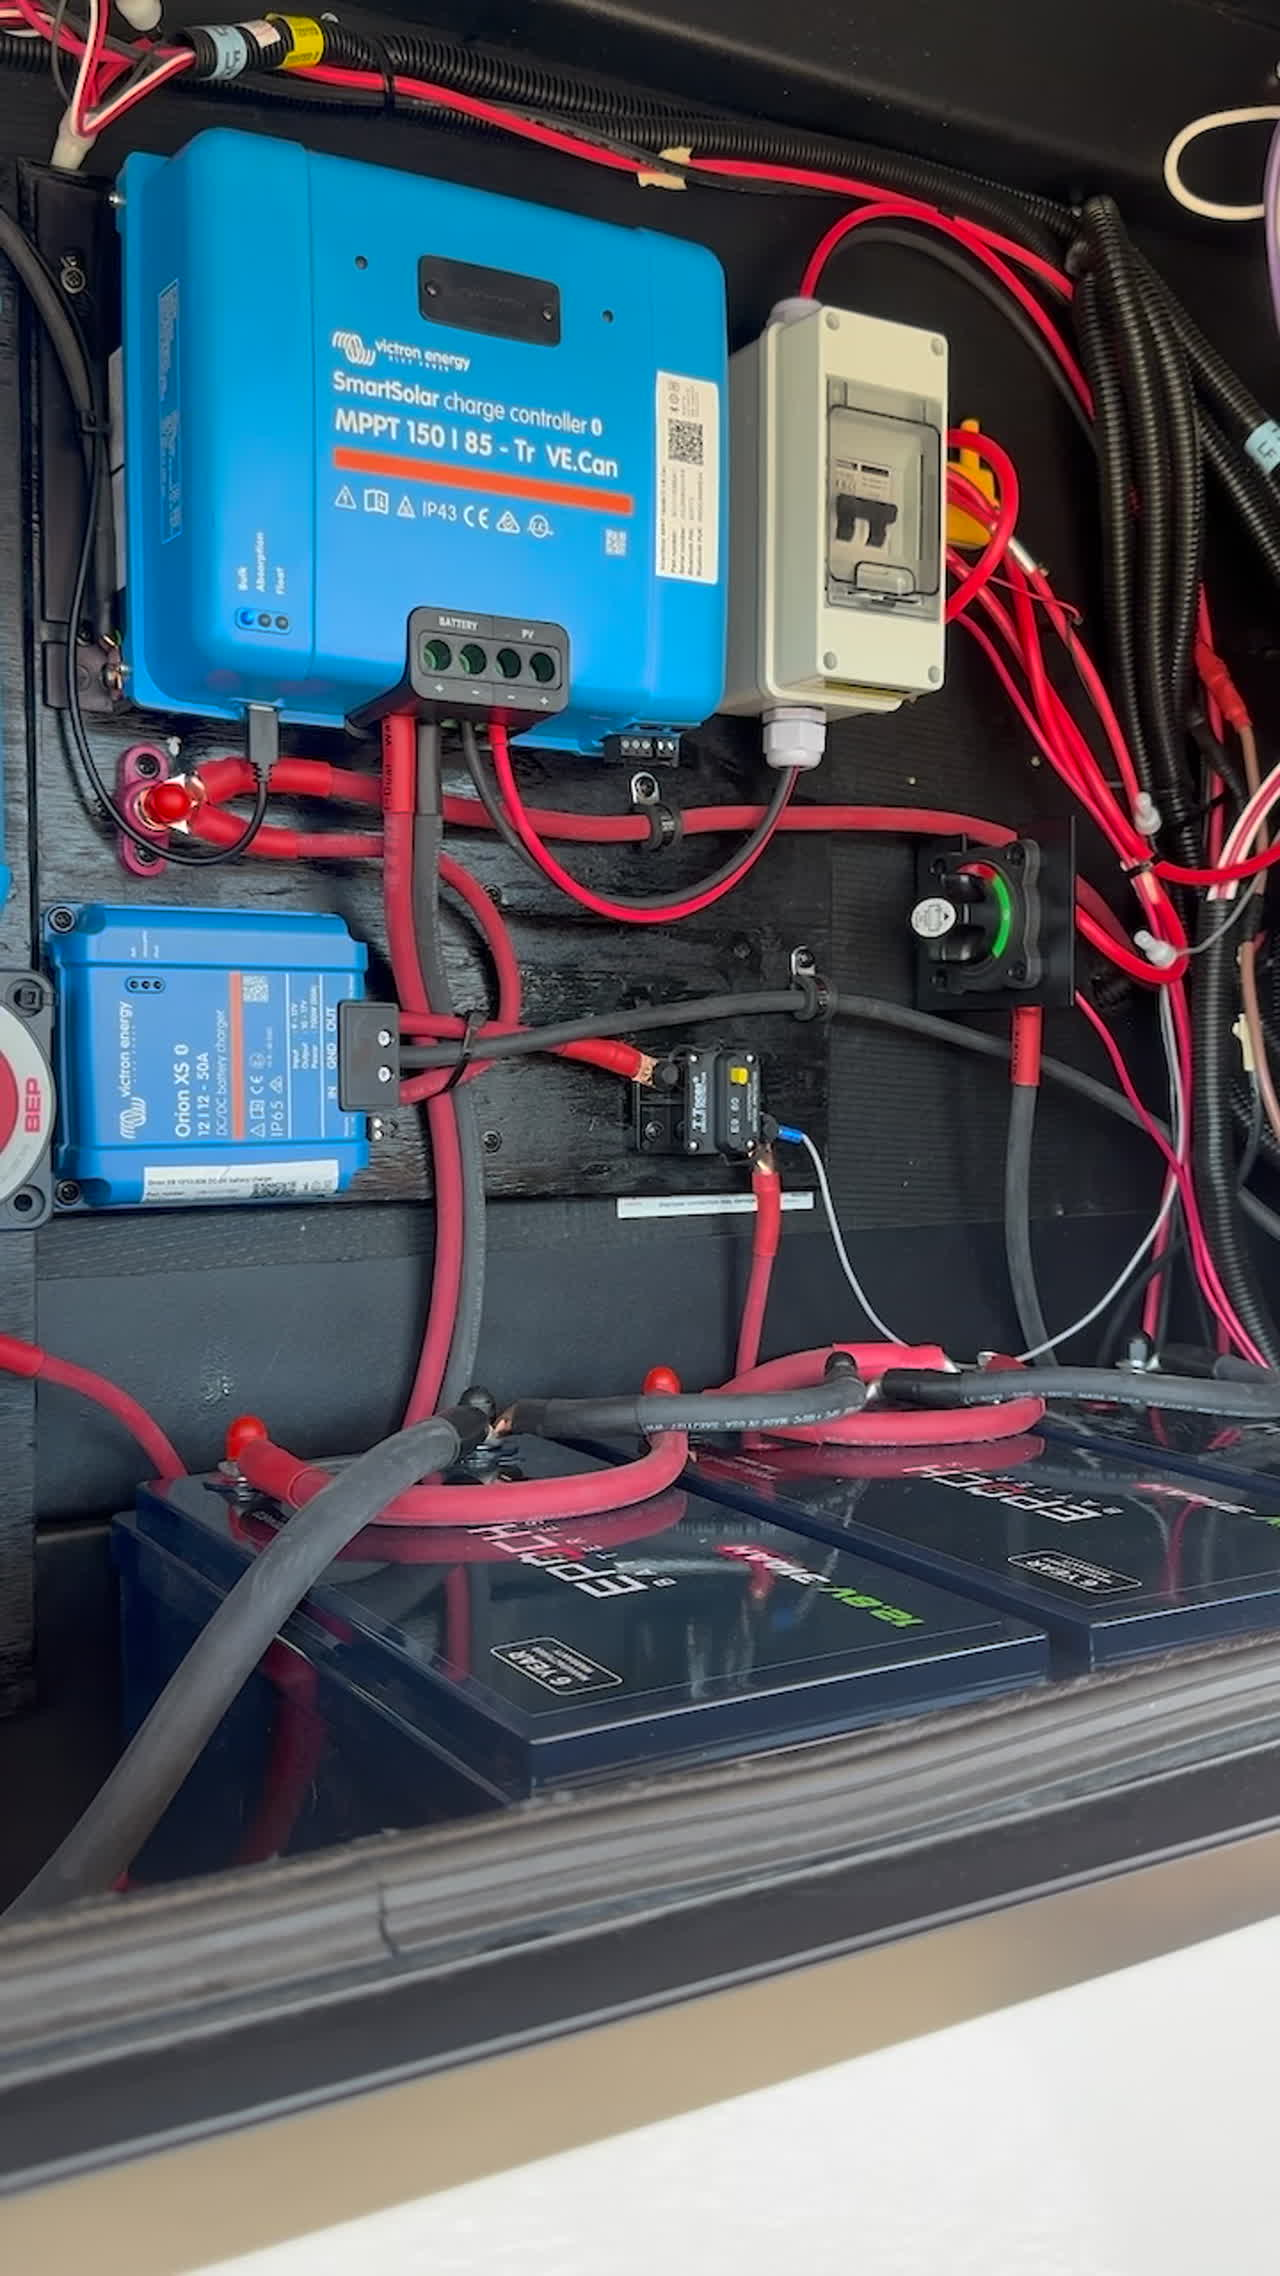
If the RV has solar installed, don’t assume “has solar” means “has a solar system that meets your needs.” Check the panel wattage (often printed on the panel itself), the charge controller model and its rated capacity, and how the wiring is run and secured. Confirm the charge controller is actually communicating with and properly configured for the battery chemistry installed — a lithium battery bank paired with a charge controller still configured for lead-acid charging profiles is a real problem we see often enough to specifically check for. See our companion guide on buying a used RV with solar already installed for a deeper walkthrough of this specific situation.
Spotting amateur or DIY electrical work
Some signs are visible even without deep electrical expertise: wire connections made with household electrical tape instead of proper marine-grade heat-shrink or crimp connectors, wiring that isn’t secured and is instead resting loose against sharp edges or moving parts, non-marine-rated connectors in a component that will be exposed to moisture or vibration, and fuses or breakers that appear to have been swapped for a higher rating than the wire gauge should carry (a genuine fire risk, not just a maintenance flag). None of these require special equipment to spot once you know to look — but most buyers don’t know to look, which is exactly the gap a real inspection closes.
Plumbing & Water Systems
Run every faucet and check water pressure and drainage. Flush the toilet (or test the cassette/system, depending on RV type) and check for proper operation. Check the water heater for proper operation and look for any signs of leaking or corrosion around it. Check all visible water lines and connections for leaks, and check holding tanks (fresh, gray, black) for cracks and confirm the level sensors and dump valves function correctly.
Heating, Cooling & Appliances
Test the air conditioning unit(s) for proper cooling and unusual noise. Test the furnace for proper ignition and heat output. Check the refrigerator on both AC and propane/DC modes if it’s a dual or triple-mode fridge, since a fridge that works fine on shore power can still have a failing mode you’d only discover off-grid. Test the stove, oven, and microwave if equipped, and check the water heater’s ignition system as part of this pass as well.
Interior & Structural Condition
Check flooring throughout for soft spots, which can indicate water damage from below. Operate every slide-out fully in and out, watching and listening for unusual noise, binding, or gaps in the seal when closed. Open and close all cabinets and drawers, checking hardware and structural integrity. Inspect upholstery and interior surfaces for wear consistent with the RV’s stated age and mileage. Check for any signs of pest activity (droppings, chew marks), which can indicate the RV sat unused for extended periods or has an unsealed entry point.
Chassis & Drivetrain (Motorhomes Only)
For motorized RVs, check the engine for leaks, unusual noise, and proper fluid levels. Inspect the undercarriage for corrosion, leaks, and any signs of previous accident damage. Check tire wear patterns for signs of alignment issues. Test brakes thoroughly, including a real-world test drive that includes both highway speeds and lower-speed maneuvering. Check the generator (if equipped) under an actual load, not just a startup test.
Documentation, Title & Maintenance Records
Confirm the title is clear and matches the seller’s identification. Ask for maintenance records — a seller who has kept them, even informally, is a good sign about how the RV was cared for generally. Ask directly about any past insurance claims, accidents, or major repairs, and cross-reference with what you find in the inspection itself; a mismatch between what you’re told and what you find is itself useful information.
DIY Checklist vs. Certified Inspection — When You Need a Pro
This checklist will catch a meaningful number of real problems, and going through it yourself before making an offer is genuinely worthwhile. But some of what actually matters — a real battery capacity test, a load test on the inverter and converter, a proper assessment of an existing solar system’s actual condition and configuration, spotting subtler signs of amateur electrical work — benefits from someone who does this professionally and has the testing equipment and experience to catch what a careful but non-specialist buyer will miss. For a purchase this size, a professional inspection is usually a small cost relative to what it can save you in an expensive surprise six months in.
Key Takeaways
- Water damage and electrical/solar issues are the two categories most likely to be expensive and least likely to be obvious from a casual walkthrough.
- A battery bank’s voltage reading doesn’t tell you its true remaining capacity — a real capacity test does.
- If the RV has solar installed, check that the charge controller is actually configured correctly for the battery chemistry present, not just that it powers on.
- Amateur electrical work has visible signs (household tape instead of proper connectors, mismatched fuse ratings, insecure wiring) that don’t require special tools to spot once you know what to look for.
- A DIY checklist pass is genuinely useful, but a certified inspection catches what most buyers can’t — for a purchase this size, it’s usually worth it.
FAQ
How long does a professional RV inspection take?
A thorough inspection typically takes several hours — often in the range of six to nine hours for a comprehensive review — since it involves actually testing systems under load rather than just visually checking them.
Can I do this checklist myself instead of hiring an inspector?
You can and should go through the visible items yourself before making any offer — many of the exterior, water damage, and interior checks don’t require special expertise. The electrical, battery, and solar section is where professional testing equipment and experience make the biggest difference.
What’s the most commonly missed problem in a casual RV walkthrough?
Water intrusion that hasn’t progressed to visible staining yet, and battery banks that read a normal voltage but have significantly degraded true capacity, are both frequently missed without proper testing.
Does this checklist apply to both motorhomes and towables?
Most of it applies to both — the chassis and drivetrain section is motorhome-specific, and everything else (exterior, water damage, electrical, plumbing, HVAC, interior, documentation) applies broadly to any RV type.
Considering a used RV purchase in Southern Arizona?
A pre-purchase inspection from an NRVIA-certified inspector who’s also an ABYC-certified marine electrician catches problems a general walkthrough won’t — especially anything solar or electrical. Get in touch before you finalize a purchase.